Are you looking for a unique quilt pattern to help you create something special for your home? If so, the watering can quilt pattern is just what you’re looking for! With its simple design and intricate details, this quilt pattern will surely add charm and personality to any room. Read on to learn more about this amazing quilting pattern!
Introduction to Watering Can Quilt
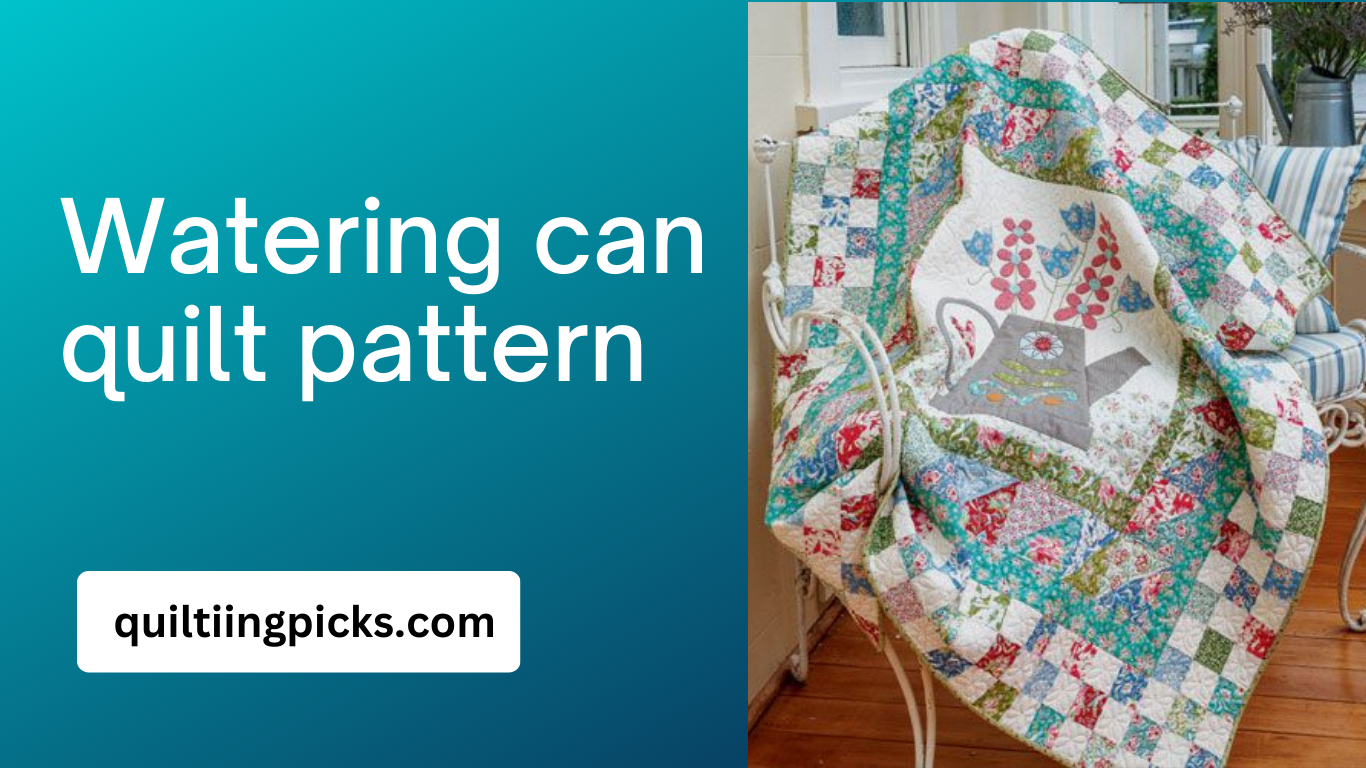
This Watering Can Quilt is a beautiful and romantic sewing project for quilters of any skill level. It features a charming watering-can design complete with tulips, daisies, and a heart at its center, surrounded by a series of patchwork borders in pretty floral fabrics. The pattern is available from The Pattern Basket and is easy to assemble using simple machine piecing with squares and rectangles. When finished, the quilt will measure approximately 54 1/4″ by 61″. This project is perfect for a featherweight singer and can charm any home.
Features of the Quilt Pattern
The Watering Can Quilt pattern features a beautiful design composed of four cute watering cans with tulips, daisies, and other embellishments. It is completed with needle turn applique and simple piecing, although desired. The applique can be done with a blanket stitch. The finished size of the quilt is 38 x 38, and all materials needed for the project are listed in the pattern. Quilters will appreciate the quality and detail of this project, as it is sure to add a bright and vibrant touch to any home or garden.
Materials Needed
Creating the Watering Can Quilt requires a few basic materials. Quilters will need fabric to cut into squares and rectangles, fusible material, batting, thread, and a needle. If you wish to use applique, you will need a pattern and interfacing. Additionally, you may want to choose a backing fabric for the quilt. It is important to ensure that all your materials are of the same quality and weight. This will help ensure that your quilt is strong and durable.
Instructions for Assembling the Quilt
Assembling the Watering Can Quilt is a relatively straightforward process. First, use the provided pattern and instructions to cut out each of the quilt pieces. Then, use a ¼ inch seam allowance. Sew together each block and row. To add extra stability to the quilt, you can use a quilting ruler and rotary cutter to ensure that all the pieces are cut accurately and that the seams are straight. Once all the blocks are sewn together, it is time to add the borders. Depending on the size of your quilt, you may need to piece together multiple border strips to get the desired length. Finally, sew all your pieces and press them out flat before adding any quilting details or finishing touches.
Adding the Borders
Adding the borders to the Watering Can quilt will be the last step before quilting the quilt. The pattern includes two outer borders and two inner borders, all in a pretty floral fabric. Be sure to measure the quilt carefully and cut your border fabric pieces to size. Use a ¼ inch seam allowance when attaching the borders for a more professional look. Once you have attached all four borders, press them with an iron so that the seams lay flat and the quilt looks neat and tidy. Now your Watering Can quilt is ready for quilting!
Adding Quilting Details
Adding quilting details to the Watering Can quilt is a way to add some extra flair and personality. Natalie chose Tilda’s ‘Circus’ Embroidery design for her quilting marks, but there are plenty of options! Whether you choose to use a machine or hand-stitch, adding quilting details will give your quilt a unique look. If you’re using a machine. Be sure to use the correct needle and thread for your fabric. If you’re using a hand-stitch, there are different stitches to choose from depending on the look you want. Once you’ve finished adding your quilting detail, it’s time to add the borders!
How to Finish the Quilt
Once all the Watering Can Quilt pieces are assembled, and the borders are added, it’s time to finish the quilt. The quilter should use a coordinating thread to stitch the quilt together, whether hand-quilting or machine-quilting. Once the quilting is finished, the edges can be bound with a binding fabric that coordinates with the Watering Can Quilt. After that, it’s time to snuggle up with your cozy new quilt!
Tips for Making the Watering Can Quilt
Making the Watering Can quilt is a fun and creative activity that crafters of all skill levels can enjoy. When it comes to piecing together this quilt pattern, there are a few tips that crafters should keep in mind. First, when selecting fabrics for the quilt, choose colors and patterns that complement each other. Additionally, use quality materials to ensure your quilt lasts a long time. If you’re new to quilting, try practicing on fabric scraps before you start on the final product. While assembling the blocks of the quilt, take care to ensure they are all even in size. Finally, be sure to read the instructions carefully and take your time as you assemble the quilt. With these tips in mind, your Watering Can quilt will turn out beautifully!
Variations of the Watering Can Quilt
If you’re looking to add a unique touch to your Watering Can Quilt, you can try plenty of variations. To start, you can switch out the Pennsylvania Tulip quilt blocks with any other quilt block you choose. You could also choose to use different colors for the Watering Can quilt blocks or change the size of the blocks for a different look. Other ideas include adding embroidered details, appliquéd elements, or embellishments such as buttons or beads. With the addition of these personal touches, your Watering Can Quilt will be one-of-a-kind and sure to be admired by all who see it.
Conclusion
The Watering Can Quilt is a beautiful project that quilters of all skill levels can enjoy. With a free quilt pattern and some simple materials, you can create a unique and romantic quilt that will become a cherished family heirloom. Whether you choose to use needle turn applique or blanket stitch, this quilt is sure to impress with its blooming watering can center and patchwork borders. With a few simple steps, you can make your Watering Can Quilt and enjoy something special for years to come.